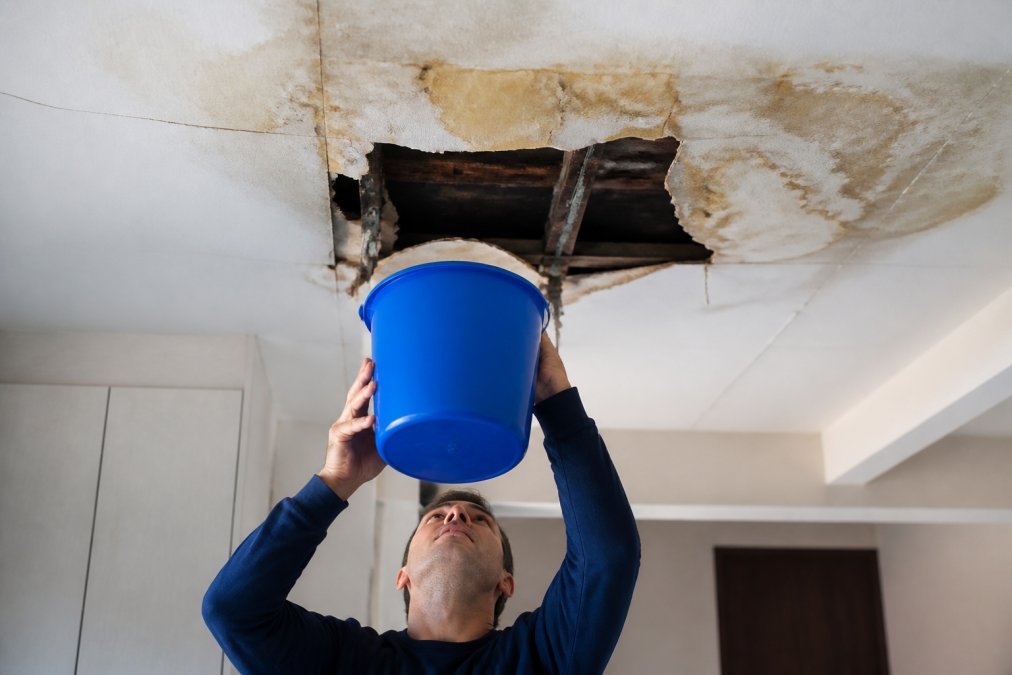
 how-to
How to Find Roof Leaks: 7-Step Homeowner Guide
Table of Contents
- What You'll Need Before You Start
- Step 1: Inspect the Attic for Signs of Roof Water Damage
- Step 2: Trace Interior Clues to the Leak Source
- Step 3: Check the Roof Surface for Damage
- Step 4: Use a Garden Hose to Simulate Rain
- Roof Leak Detection Tools That Pinpoint the Source
- Roof Leak Repair Cost: What Drives the Price
- Safety Gear and Ladder Protocols for Roof Inspections
- When to Call a Professional
- Frequently Asked Questions
Last Updated: September 20, 2026
What You'll Need Before You Start
Finding roof leaks starts with the right gear and a safety plan. At Leak Remedy, we've spent 12 years tracking water through attics and across roof decks.
Gather these first:
- A bright flashlight or headlamp
- Binoculars for ground-level checks
- A garden hose with a spray nozzle
- A moisture meter
- Chalk or painter's tape
- Work gloves and non-slip shoes
- A notebook and phone camera
A moisture meter is a handheld device that measures water content in wood, drywall, and insulation.
Step 1: Inspect the Attic for Signs of Roof Water Damage
Start in the attic on a rainy day if you can. Water shows up faster when it's actively flowing. Look for water stains on the roof deck, damp insulation, and dark streaks on rafters.
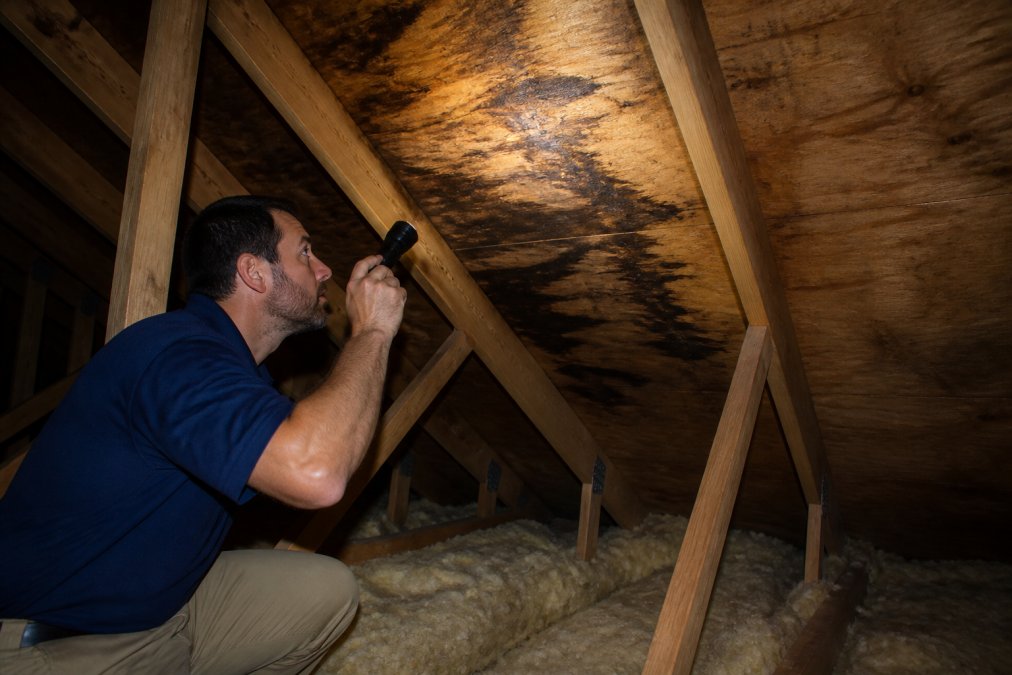
Reading Water Stains, Black Marks, and Musty Odors
Brown or yellow rings mean old roof leaks. Fresh drips mean an active one. Black marks often point to mold growth, which needs moisture to survive.
Step 2: Trace Interior Clues to the Leak Source
Water rarely drips straight down. It follows the roof pitch, runs along joists, and exits wherever gravity pulls it. This is the single most misunderstood part of leak detection: the stain on your ceiling is usually not under the hole in the roof.
Why the Leak Inside Is Rarely Under the Hole Outside
Water entering a roof has to travel before it becomes visible. It wicks along the top of roof sheathing, follows the low side of a rafter, and pools on top of a ceiling joist until it saturates the drywall below. By the time a brown ring appears, the water may have moved 5 to 15 feet from the entry point, often downhill and sideways, not straight down.
- Stains near a wall usually trace back to a wall flashing or step flashing failure uphill of that wall.
- Stains near a chimney often come from a chimney cricket or counter-flashing gap, not the chimney itself.
- Stains along a valley typically originate higher in the valley where underlayment has failed.
- Stains at a ceiling fan or light mean water is running along a wire or conduit, the entry point is uphill along that same run.
Interior Clues Worth Marking Before You Go Outside
Walk the interior with chalk or painter's tape and mark every clue. You are building a map, not fixing anything yet.
- Ceiling stains, especially rings with a darker outer edge
- Bubbling or peeling paint on ceilings and upper walls
- Warped baseboards or swollen door frames
- Damp carpet or a musty smell near exterior walls
- Sagging drywall, a sign of long-term saturation and a stop-work signal
Matching Interior Clues to Exterior Suspects
Once you have interior marks, translate them into a short list of exterior suspects before you climb:
| Interior clue | Likely exterior source |
|---|---|
| Stain near chimney | Chimney flashing, cricket, or counter-flashing |
| Stain at valley | Valley underlayment or debris dam |
| Stain near vent pipe | Vent boot or pipe collar |
| Stain along a wall line | Step flashing or sidewall flashing |
| Stain near skylight | Skylight curb flashing or sealant |
Step 3: Check the Roof Surface for Damage
From the ground, use binoculars to scan for missing shingles, cracked flashing, and worn vent boots. These are the most common entry points.
Flashing, Vent Boots, and Roof Valleys
Flashing is the metal that seals joints around chimneys, skylights, and walls. When it lifts or rusts, water slips underneath.
Step 4: Use a Garden Hose to Simulate Rain
The hose test works when you can't wait for a storm. Done right, it isolates a single suspect area and confirms it in minutes. Done wrong, it soaks the whole roof and tells you nothing.
Set Up Before You Spray
- Have a helper inside with a phone and a clear line of sight to the suspect ceiling area.
- Use a spray nozzle set to a moderate fan, not a jet. A hard stream can force water past flashing that would never leak in real rain.
- Start with the roof dry. If it rained recently, wait at least 24 hours so you can attribute any new moisture to your test.
- Pick one suspect at a time, a single vent boot, one flashing run, one valley section. Spraying the whole roof defeats the purpose.
Work Bottom to Top, One Section at a Time
Water runs downhill, so testing uphill first can send water down onto areas you haven't tested yet and create false positives.
- Start at the lowest point of the suspect area and spray upward, keeping the nozzle about 12 to 18 inches from the surface.
- Spray a single section for 5 to 10 minutes. Real leaks often need sustained water, not a quick pass.
- Pause and have your helper check inside. Most active leaks show within 10 to 15 minutes of continuous spray.
- If nothing appears, move up in 3-foot sections and repeat.
- Note on your chalk map where water appears and which section you were spraying at that moment.
Reading the Results
- Water appears during a specific section, you have found the entry point. Mark it and stop spraying that area.
- Water appears only after several sections, the entry point is uphill of where you started; keep moving up.
- No water appears anywhere, the leak may be intermittent, driven by wind-driven rain, or entering through a path the hose can't reach, such as a wall assembly or a plumbing vent. A moisture meter and a thermal camera are the next step.
When the Hose Test Isn't the Right Tool
The hose test is best for flashing, vent boots, valleys, and skylight curbs, places where a small, directed spray can reproduce the leak. It is a poor fit for:
- Wind-driven rain leaks that only appear in storms
- Leaks through roof sheathing itself, which need sustained saturation
- Leaks that originate in a wall assembly or around a plumbing stack
Roof Leak Detection Tools That Pinpoint the Source
Basic tools catch most leaks. Advanced tools catch the rest.
| Tool | Best For | Skill Level |
|---|---|---|
| Moisture meter | Confirming damp wood and drywall | Beginner |
| Flashlight | Visual attic inspection | Beginner |
| Garden hose | Simulating rain on demand | Beginner |
| Thermal imaging camera | Finding hidden moisture behind walls | Pro |
| Drone with camera | Scanning steep or tall roofs | Intermediate |
Roof Leak Repair Cost: What Drives the Price
Roof leak repair cost depends on where the leak is and how much damage it caused. A simple flashing reseal costs far less than replacing rotted roof sheathing.
Key cost drivers:
- Leak location and accessibility
- Extent of water damage
- Whether mold remediation is needed
- Roof age and material
- Insurance coverage
Safety Gear and Ladder Protocols for Roof Inspections
Falls cause more injuries than the leaks themselves. Before you climb, set the ladder on level ground and lock every joint.
- Keep three points of contact at all times
- Wear non-slip shoes with clean soles
- Avoid metal ladders near power lines
- Use a safety harness on any roof above one story
- Never walk a roof when it's wet, icy, or windy
When to Call a Professional
Call a pro when the leak is active, hard to reach, or tied to storm damage. Signs it's time:
- Water is entering faster than you can trace it
- The leak sits near chimneys, skylights, or valleys
- You see sagging ceilings or soft spots
- Mold is spreading
- Your roof is over 15 years old
Frequently Asked Questions
How much does it usually cost to fix a roof leak?
Roof leak repair cost depends on the leak source, roof pitch, and materials. A simple flashing or vent boot repair sits at the low end, while leaks involving roof valleys, chimney crickets, or damaged underlayment cost more because they need more labor and materials. Storm or hail damage can push the figure higher.
Does homeowners insurance cover roof leaks?
Most policies cover sudden damage from storms, hail, or wind-blown debris, but not leaks caused by age or neglected maintenance. Document everything before repairs begin: photos of interior water stains, damaged shingles, and the leak source. Leak Remedy works directly with insurance companies and helps homeowners file claims, which reduces the back-and-forth that leads to denials.
How do professionals detect roof leaks?
Pros combine visual inspection with roof leak detection tools. They check the attic for water stains and damp insulation, examine flashing, vent boots, and roof valleys, then use moisture meters and thermal imaging to trace water intrusion to its source. A garden hose test confirms the location. This method finds the leak source even when interior and exterior clues point to different spots.
Can you have a roof leak and not know it?
Yes. Slow leaks often go unnoticed for months because water travels along the roof deck and drips far from the entry point. Watch for musty odors, peeling paint, black marks on ceilings, or rising utility bills. Schedule an attic inspection twice a year, especially after storms. Catching signs of roof water damage early prevents mold growth and structural damage.
A slow leak can rot your roof deck for months before you notice. Leak Remedy combines expert leak detection, insurance claim support, and full repair or replacement services to stop the damage fast. Our family-owned team has 12 years of experience protecting homes and businesses across Alabama. Get a quote from Leak Remedy and protect your property before the next storm.